Avionte Email Setup
Here is a short tutorial I whipped up for setting up email in Avionte. There is probably one in the Avionte support portal but I took screen shots with our specific information already filled in. Hope it works. The only piece of information that you need that isn’t included here is your email password. If you don’t have yours, I believe that Marie can retrieve it for you. If not I can retrieve it for you, too. Without your email account password you won’t be able to complete the setup. If you think you know what your password is try logging into webmail with your credentials at https://mail.specialops.com. If you get in to webmail you know that your credentials are correct for Avionte email setup. Okay, on to Avionte…
1.) Log into Avionte BOLD at the following address with your Avionte credentials which are different than your email info:
https://hamiltonconnections.myavionte.com/staff/
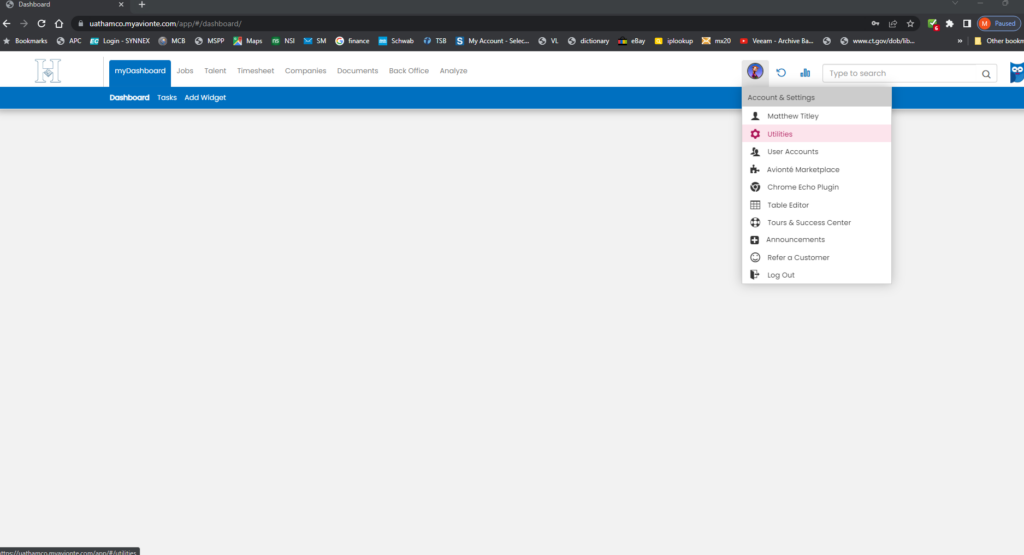
Click on the user icon at top and click “Utilities”
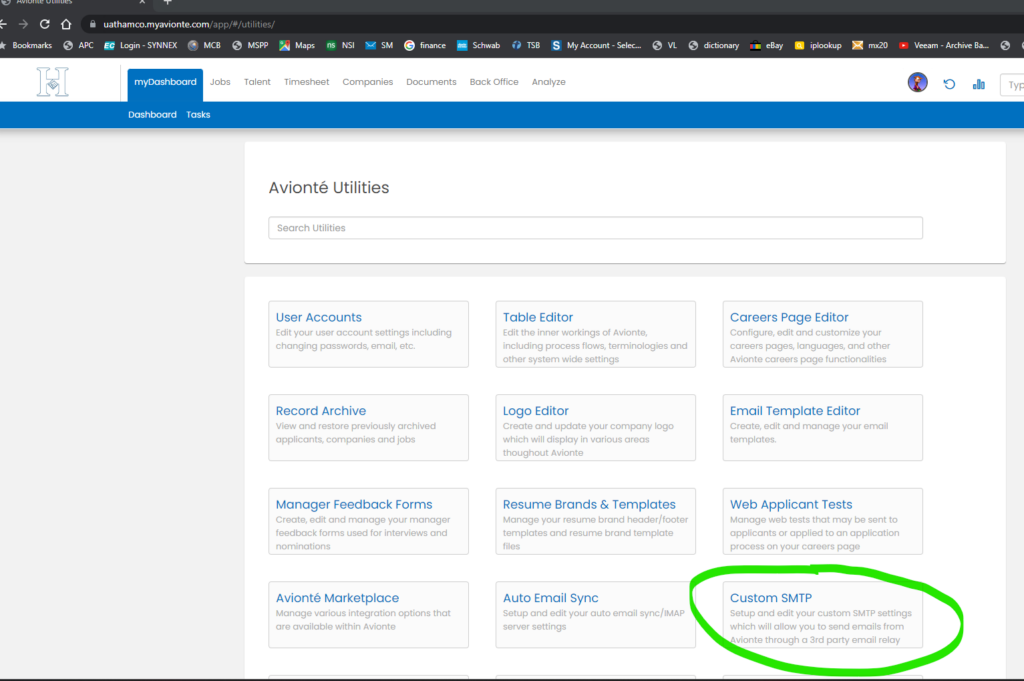
Now click on “Custom SMTP” on the right.
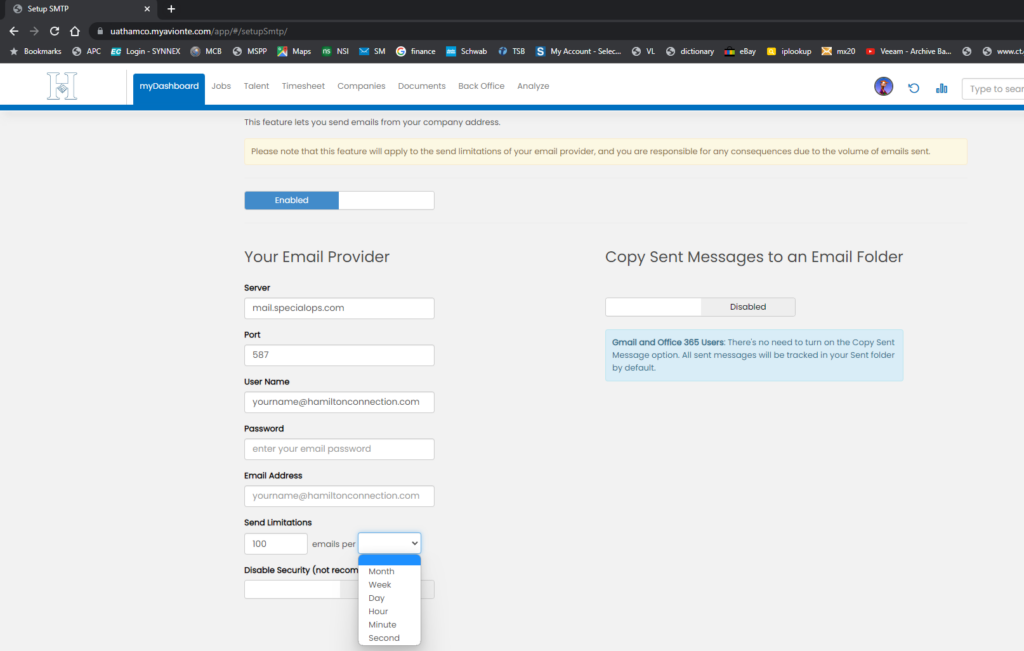
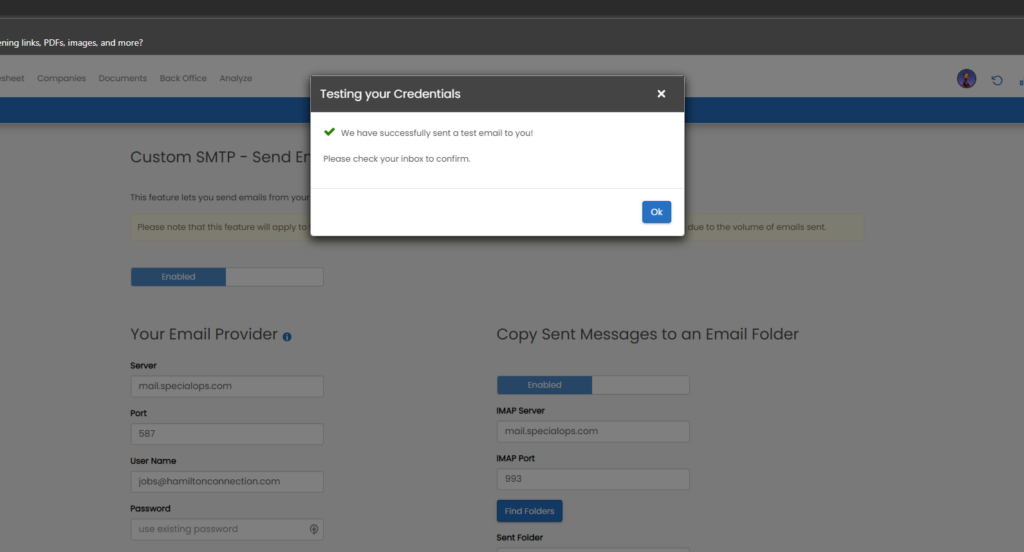
Now. This is the screen where we fill in all the necessary email server settings info. Below is a screen shot with the initial settings listed under “Your Email Provider” but I’ll list them here, too.
Server: mail.specialops.com
Port: 587
Username: youremailaddress@hamiltonconnection.com
Password: youremailpassword
Email Address: youremailaddress@hamiltonconnection.com
Send Limitation: 100 per hour
Disable Security: No, leave it alone aka “Secured”
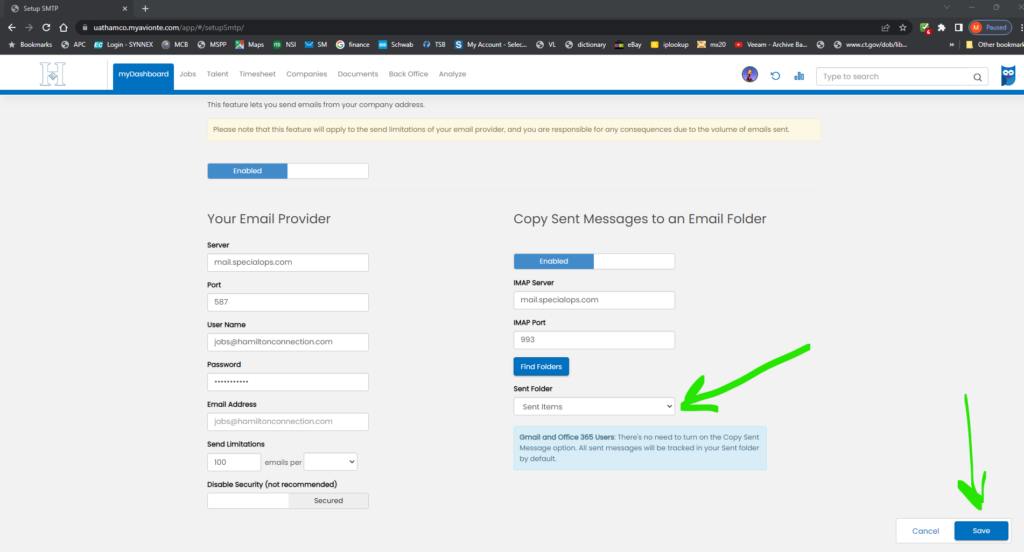
Once you fill out the left hand side correctly, on the right hand side of the screen click the “Copy Sent Messages” to enabled. Fill out this section as follows:
IMAP Server: mail.specialops.com
IMAP Port: 993
Now click the “Find Folders” button. If the credentials entered previously are correct you can now click the drop down menu under “Sent Folder”. Select your “Sent Items” folder and then click “Save” at the bottom.
If you did everything correctly you should get a message that says success with a green check.
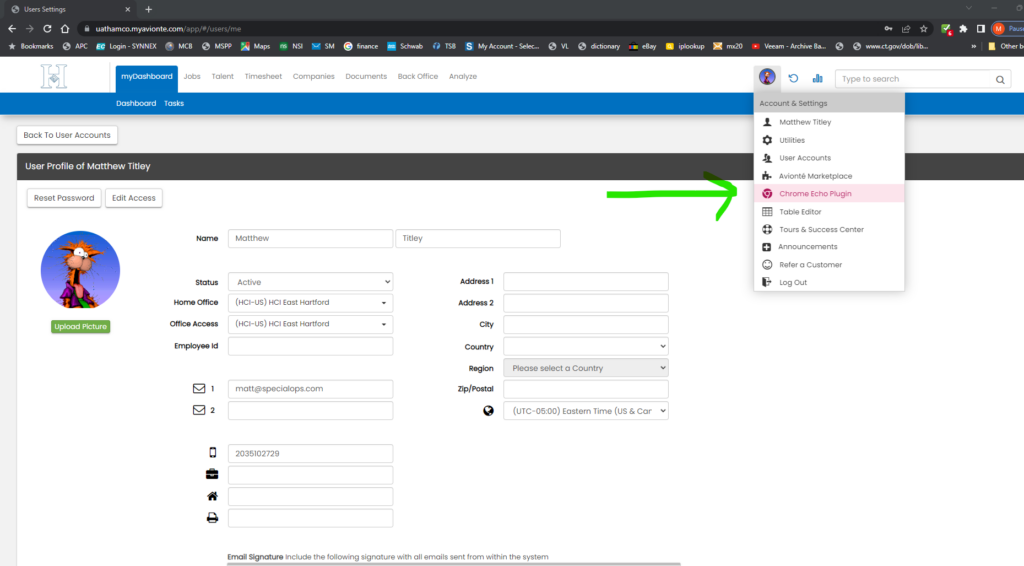
There is one more thing that Avionte recommends doing and that is installing the Chrome Echo plugin. Hit the user settings again and then click the “Chrome Echo Plugin” link and hit “Add to Chrome”
All done!
